How to convert your trash bin into a worm farm

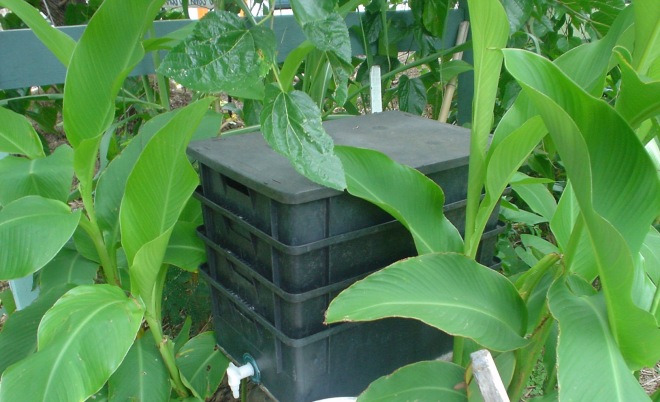
We were lucky enough to find an old rolling rubbish bin and decided to repurpose it into another worm farm. Trash bins are a great way to collect worm juice and castings in a vertical space. The bins can readily be found in tip and junk shops. When choosing a bin make sure that the lid is easy to open and close also that the bin did not hold anything toxic to nature.

Benefits

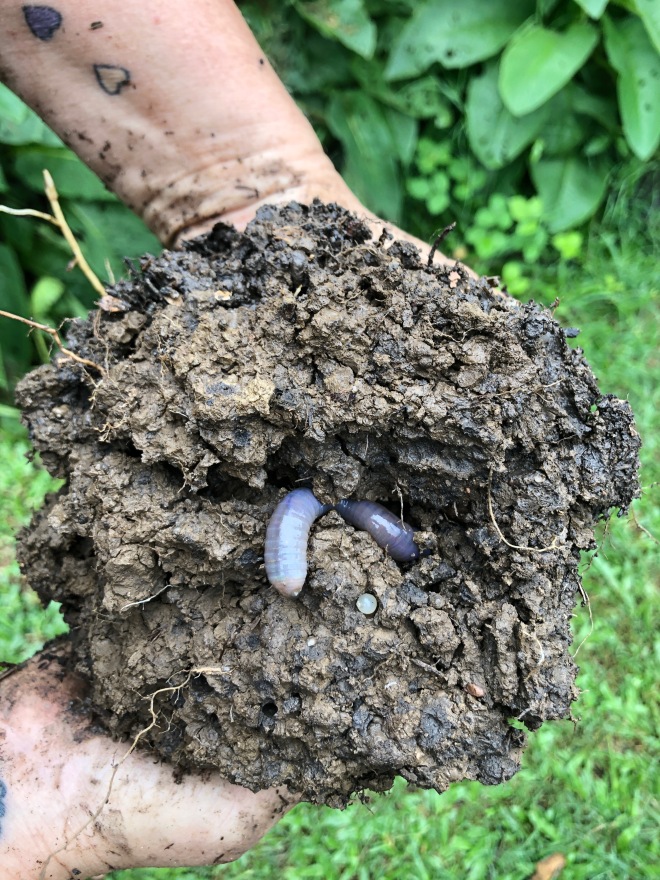
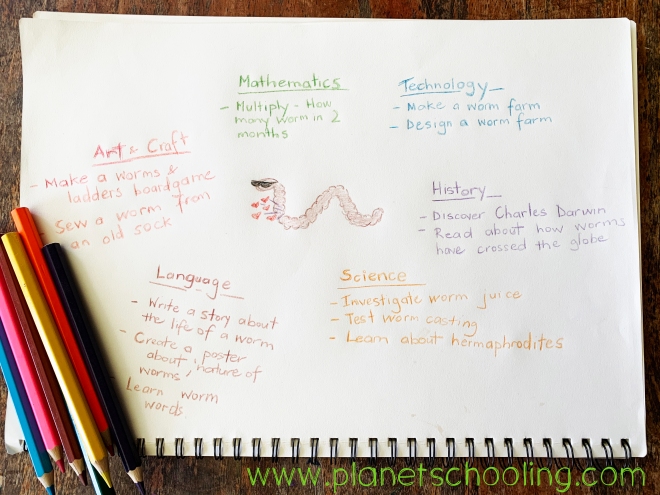
You can never have enough worm castings and juice. Our backyard farm is ever expanding and we are constantly using worm castings and juice on the soil and as a foliar spray. Our worm farms are turning out to be a great homeschooling resource as well.

DIY conversion

  1. Worms need oxygen so you will need to make air holes or a vent. You can buy a vent but we opted for the cheaper option. We simply drilled holes straight into the bin and the lid. Ravi created some patterns, so we used this as our guide.
    drilling holes.jpg
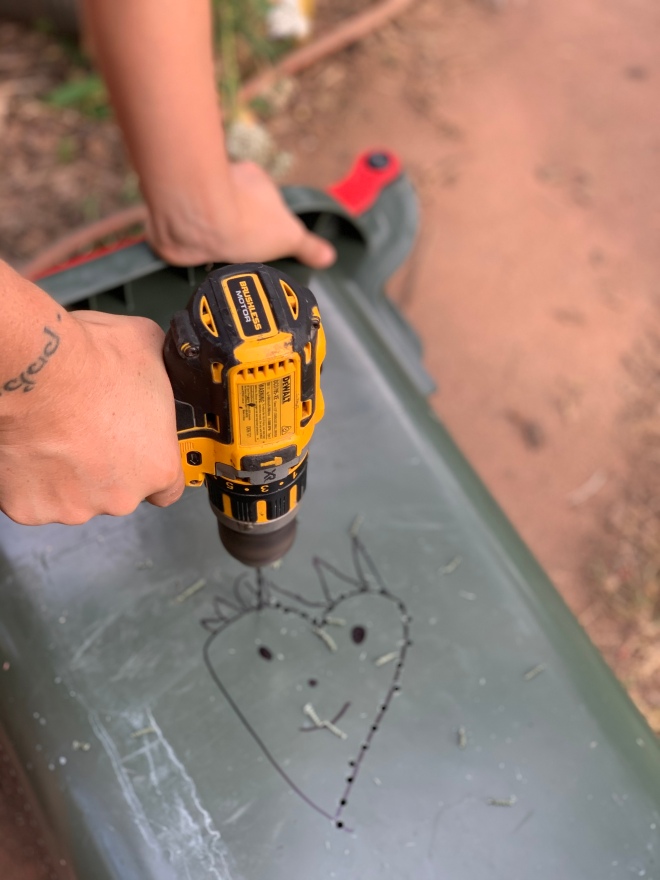
    Drilling air holes into the side of the bin.
    painting the worm farm
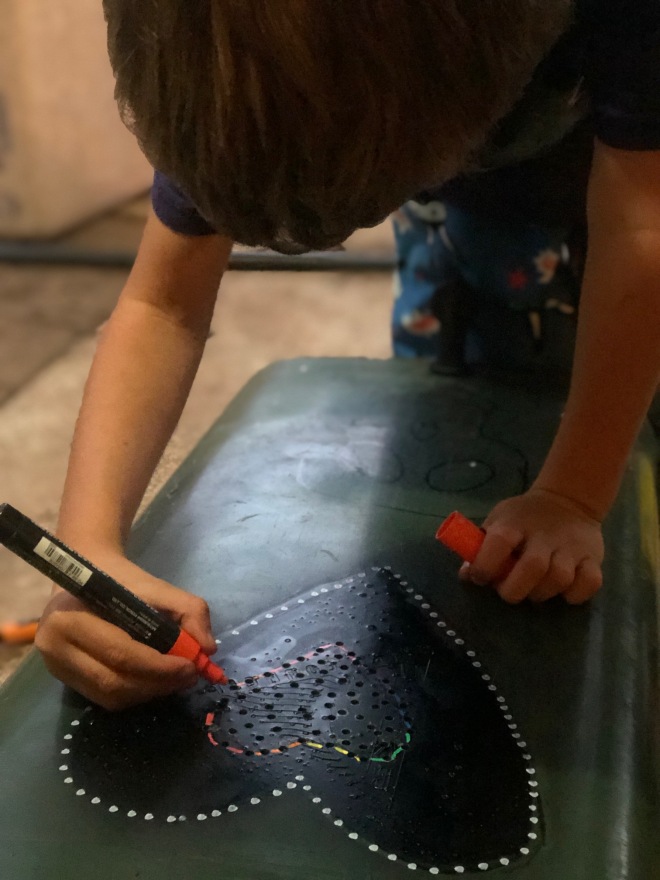
    Ravi adding the finishing touches to the bin.

    2. Next step was to make a porthole at the back. The porthole aids in removing the worm castings. We repurposed a metal tray that belonged to dish rack. The tray was riveted onto the plastic. Then hinges and latches were lined up and riveted on. A hole was then cut with a jigsaw smaller that the pothole.

latches3. Next is to connect a plastic tap which is needed for draining the worm juice. Drill a small hole into the front panel of the rubbish bin. Place a washer on the tap and put it in place. Fill the base with non-toxic wood or pebbles. We used both.

Place shade cloth on top of the stones. This protects the worms from falling in between the stones and juice. You can also use hessian (in time the worms will consume the hessian 😉

  1. Position the worm farm in its permanent place. You may need to place it onto a platform so you have easier access to the tap. We used a concrete block that was found on the property. Once it’s positioned, add the bedding. We used our standard mix of soaked cardboard (without much print) with well matured mulch (or if we can find horse manure even better).

worm beddingOne week later

The worms are loving their new home. They are processing the food scraps at a fast pace.  We had a sneak preview of the worm castings and things are looking fine. In a month or so the bedding will be eaten and we will need to keep feeding them from the top.  We will keep you posted on how easy it is to remove the worm castings.

If you are interested in more articles, subscribe here or share the article ❤

Why a worm farm is a great homeschooling activity

The squiggly worm is loved by some and unfortunately feared by most! Yet the worm is one of our best allies. Who would be crazy enough to study worms for forty years, well Charles Darwin of course.

Teaching children to care for worms not only helps the planet but helps us too! Worms create free fertiliser for organic gardens, making your veggies taste better.

Worms have played a more important part in history of the world than humans would at first suppose. Charles Darwin

Cool facts about worms

  • The earthworm has 5 hearts! Their hearts aren’t multi-chambered heart like mammals or reptiles, they are a series of single-chambered aortic arches and they have five of them.
  • Worms have no head, eyes or teeth. So they don’t bite!
  • The earthworm “breathes” through its skin.
  • Worms are so strong that they are capable of digging as deep as five meters down and can move a stone fifty times its own weight.
  • Worms are hermaphrodites, which means they have both male and female organs of procreation, and must perform a reciprocal act of copulation to fertilise and be fertilised.
  • Worms throw their bodily excrements, known as castings or worm humus behind them. This is free fertilizer for nature.
earthworm
Earthworm and mini egg

Why make a worm farm

Charles Darwin states that all the fertile areas of this planet have at least once passed through the bodies of earthworms. His book “The Formation of Vegetable Mould” summarizes his studies on earthworms.

Darwin states that the worm is the plough, the chemist, the fertilizer, the cultivator and distributor of nature’s plant food. In any case, the worm surpasses any instrument invented by man to plough, cultivate or fertilize the soil.

Feed nature and she feeds you.

lesson plan
Lesson plan

So it makes total permaculture sense to introduce the element of a worm farm into your home garden, and better still it’s a homeschooling project that benefits the planet and your children.

What worms to use for your worm farm

There are several types of worms. The three main categories are:

Epigeic – worms that live close to the soil surface and feed on plant litter. These are the worms we usually use for a worm farm, as they love to munch things for hours on end. Californian red worms are easy to find or ask a friend to gift you some. My first worm farm was created with worm eggs that my daughter and I found in some compost.

Anecic – worms that feed on plant litter, soil and form vertical burrows. These are the worms we usually call earthworms. They prefer to live in nature and are not fond of worm farms, as they like to dig deep. These are the  worms that like to throw their castings above the surface of the soil, forming small mounds.

Endogeic – worms that live deep in mineral soil horizons and feed on soil. Hard to find but you may find these worms when excavating a site.

Worm projects

If you are tight for cash, this model of worm farm works fine. It’s really cheap and has been tried and tested. It is also possible to make a worm farm straight on the ground but a little difficult to conatin them. Watch the video here to see the system we use in a home garden.

The power of change

This is a moment for change. The Covid-19 virus has reminded us that we too, need to be in sync with Mother Nature.

It is not the strongest of the species that survives, nor the most intelligent, but the most responsive to change. Charles Darwin

Educating your child/ren to work with nature rather than against nature is a precious gift for the future well being of your child/ren. Good Luck, and send in any questions about worms here! Also sign up for our newsletter. worms

How to make a really cheap worm farm

Of the vast array of creatures that live on Planet Earth, the earthworm is probably the most important for humans. Few creatures, such as earthworms, are so essential for good plant health and growth, and therefore indirectly they are very important for human health.

Earthworms excrete a substance called humus. Humus is a dark brown/black mass of well decomposed organic matter that adds minerals and nutrients to the soil. Humus is important for plant growth, improves soil physical structure, attracts other earthworms already present in the soil and improves the biological properties.

Now is your chance to cultivate these little miracles of nature. Creating a worm farm is a great activity to do with kids who live in urban centres or in rural areas. Before you begin, it is essential that you think of a system that is ideal for your situation, whether at home or on the farm.

Choosing a system

There are quite a few worm farms on the market. A worm farm should be simple to operate; be pest, fly and rat-proof; have easy access and have a drainage point to collect excess liquids and allow ventilation.

If you are making your own worm farm use materials that will not chemically react with the contents of the worm farm. You can use plastic crates, small barrels or a concrete trough.

How to make a really cheap worm farm

This is probably the easiest and cheapest worm farm you can make. Actually a cardboard box is probably the cheapest. I made this worm farm on the run as I was building a garden and disrupted a few worms. I planned to return the worms to the area once the garden was constructed. For this worm farm I found an old crate, some twine and a piece of old hessian.

Bedding

Worm bedding is also the food source of earthworms. The bedding should have a lot of carbon. A wide variety of materials can be used for bedding in your worm farm. For this worm farm I soaked shredded cardboard (without print) in water. Then I mixed it with a handful of cow manure collected in the area and mature compost.

Other materials for worm bedding include horse manure, coco coir (fiber), straw and hay, fallen leaves and wood chips. The bedding should always be moist and loose to allow the earthworms to move and facilitate aerobic decomposition. In time the bedding will turn into humus.

What worms to use

Of the 6,000 known earthworm species, among them are the red worm (Lumbricus rebellus) and the tiger worm (Elsenia andrei). These species are especially useful for recycling organic matter back into the garden. These compost worms, as the name implies, are found exclusively in manure compost piles or in soil heavily laden with decayed animal matter.

worm farm
Worms ready to be divided into another worm farm.

Worm Food

Charles Darwin discovered that earthworms eat about half their weight per day. They eat pretty much everything that was once alive. Feed your worms all your kitchen scraps including crushed egg shells for grit and add soaked cardboard when the bedding gets a little low. I just pop the food on top of the bedding and let the worms do their job.

Can I compost meat scraps?

Worms can eat meat. Their digestive fluids are similar to those of higher animals. However adding meat to the worm farm tends to attract carnivores such as rats and cats, so it’s best to avoid this. Worms will naturally go to the food that is easier to digest leaving the meat to rot attracting flies and other greeblies.

Can I compost dog and cat feaces?

Bacteria such as E. coli and other fecal pathogens may be contained in a compost bin if contaminated fecal matter is added. Dog and cat feaces can be composted but it is not recommended to put this into your food gardens. In another article we will explain how to compost pet poo which is a similar method to composting human manure. Especially useful if you don’t have access to a local council green bin.

Positioning your worm farm

I always top the worm farm up with a little straw. This protects the worms from the harsh sun. The lid I used for this farm was a repurposed woven lid. Always make sure that your lid has holes/gaps in it to allow ventilation. Position your worm farm in the shade either under a tree or on your balcony.

Interesting facts:

  • If you cut a worm in half you don’t have 2 worms, you have a dead worm.
  • A worm is 95% water. So if you leave the worms in the sun they will dry out.
  • Worms have 5 hearts.
worm farm in shade
Worm farm in shade