How to make aloe vera gel

Aloe vera is one of those plants that everyone should have in their garden. It has been used for centuries to heal burns, moisturiser the skin and sooth irritations. It is believed that Aristotle told Alexander the Great, to use aloe vera to treat wounded soldiers and Cleopatra also used aloe in her daily skin treatments. I am using the aloe vera gel to make my own hand sanitiser. The aloe vera in the hand sanitiser moisturises the hands.  

Making Aloe vera gel

Making gel from aloe vera is simple. Since aloe vera gel is perishable, it
is best not to make a large batch at once. Cutting just a leaf or two, especially if they’re large, should be sufficient to make 1/2 to 1 cup of gel. If it is a small plant, cut one leaf at a time and wait until another starts to grow.

Aloe vera helps to remove harmful pollutants known as VOCs from the air.

What you will need:

  • Aloe leaf
  • Sharp knife and vegetable peeler
  • Sterilised jar
  • Optional: 500mg powdered Vitamin Caloe vera Instructions

1. With a sharp knife, cut the thickest outer leaf on the aloe vera plant, near the base of the plant. The outer leaves are older and should be the thickest,  containing plenty of fresh gel.

2. Wash/wipe away any dirt.

3. Place the leaf upright in a cup to let the dark yellow resin drain out. Drain the resin for 5 minutes or so. The resin can be slightly irritating to skin. Wipe any residue from the leaf with a cloth.

4. With a knife and vegetable peeler, remove the outer skin, both front and back. If you have large leaves, it may be helpful to cut them into smaller pieces before peeling. 

5. Place the ‘see through’ gel into a bowl. If you are having difficulty cutting the green outer skin, use a small spoon to scoop the gel into a bowl.peeled aloe vera
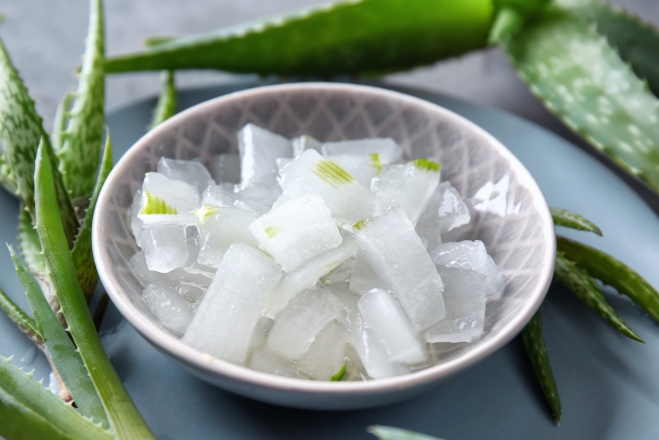
6. Once you have sufficient aloe, place the pieces into a blender and process until smooth. You will notice that the aloe vera may become a little foamy.  After awhile, the foam will settle.

If you are planning to store the aloe vera gel for over a month, mix gel with a natural preservative. Blend 500mg of powdered Vitamin C for every 1/4 cup of gel you make.

7. Place the gel in a sterilized glass jar and store in the fridge for a week or two. If you used the preservative, the gel will keep for several months in the refrigerator.aloe vera gelPlace the peel into the compost bin or place around a tree as mulch

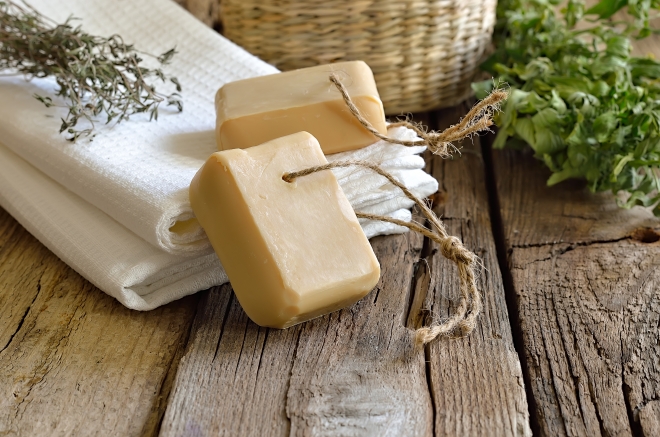
Apply the aloe vera gel to sunburn or other minor surface burns or itches. Aloe vera can also be used as a skin moisturizer or an ingredient in homemade body products, such as the hand sanitiser. Check out the recipe. 

ale vera

How to Make Hand Sanitiser Gel

There is some truth in the saying “keep calm and wash your hands.” A traditional bar of soap is so good at removing substances from your hands that it not only washes away dirt but other undesirables as well. Mixed with good hand washing techniques (at least 3 minutes if you have something gnarly on your hands), soap is able to remove bacteria, fungi, protists (such as single-celled amoeba) effectively.

Yet, if you are road tripping, at a music festival or at school without soap, hand sanitiser can be extremely handy. Alcohol-based hand sanitisers can quickly reduce the number of microbes on hands in some situations, but take heed, sanitisers do not eliminate all types of germs.

sanitizer

The best way to use hand sanitiser is to wash your hands with soap first, then apply a thin coating of hand sanitiser.

The recipe

This hand sanitiser uses rubbing alcohol and  ‘Thieves’ essential oil blend.  Rubbing alcohol (also called surgical spirit and ethanol based liquid) is a solution made of isopropyl alcohol and water. It is commonly used as an antiseptic and in cleaning solutions. For this recipe you will need:

  • 1 cup of rubbing alcohol
  • 1/2 cup of 99% aloe vera gel
  • 50 drops of Thieves essential oil blend 
  • A squirt bottle or two

Part One: Making the Thieves essential oil blend

Thieves essential oil blend is believed to be a strong disinfectant. So strong that it was supposed to ward off the Black Plague in the 14th century. Curiously this blend was created by thieves.

The four thieves protected themselves from the Black Plague with cloves, rosemary, lemon and cinnamon while robbing victims of the killer disease.

When the King heard about the story of the thieves he wanted to know their secret. The thieves were caught and brought before the King. He gave them a choice to either share their secret of “immunity” or be burned at the stake. They decided to share their secret. The King immediately posted the thieves secret formula all over the town. So here it is!

In a 15 ml bottle amber or cobalt bottle add essential oils:

40 drops of clove oil which is an analgesic, antibacterial, antifungal, anti-inflammatory, a strong antiseptic and an immune stimulant.

35 drops of lemon oil which contains a powerful antioxidant called d-limonene that has been linked to healthy immune system function.

20 drops of cinnamon oil which is antibacterial, antifungal, anti-inflammatory, antimicrobial, antiviral and antiparasitic.

10 drops of rosemary oil which is an analgesic, antibacterial, antifungal, anti-infectious, and also an expectorant.

My favourite tweak is the addition of 15 drops of eucalyptus essential oil which is analgesic, antibacterial, anti-infectious, antiviral, and expectorant.

Eucalyptus / gum tree leaves

Part Two: Making the Hand Sanitiser

Hand Sanitizer

  1. Gently mix rubbing alcohol and aloe vera gel  in a bowl. If you would like to make your own aloe vera gel, check out the recipe here.
  2. Add Thieves essential oil blend.
  3. Pour into several squirt bottles.
  4. Label and date the squirt bottles.
  5. Store the bottle away from direct sunlight.

Use as needed to remove germs from hands.

And what of antibacterial soap?

A study done by the University of California found that just infusing regular soap with compounds like triclocarban or triclosan typically creates antibacterial soaps. The FDA has recently stated that there is little evidence that either triclosan or triclocarban infused soaps are more efficient at removing germs than soap by themselves. In response to the dubious benefits of antibacterial soaps, the Food and Drug Administration has actually instituted a ban on hand soaps which contain antibacterial ingredients, citing that there aren’t enough benefits to merit the inclusion of the substances.

So when it comes to washing your hands, plain old soap, with a little technique and water will do just fine.

soap

How to make natural ketchup for waste free living

If you are a lover of ketchup or know someone who is, this could be your recipe. This natural ketchup recipe takes 5 minutes or so to make. It tastes yummy and is healthy at the same time, so no need for guilty feelings when serving this ketchup.naturalketchup

Commercial ketchups can have hidden sugars, corn syrup and preservatives with lots of numbers.  My general rule is, if I don’t understand the ingredients list, I don’t buy it. Also throwing away a plastic container every time you finish a ketchup can take its toll especially if you have children in the house who love ketchup.

Maple tree
Old maple tree

Natural ketchup has many benefits. This recipe uses Canadian maple syrup, but you can use stevia or even molasses to sweeten.

Pure maple syrup is tapped from a tree and is less processed than refined sugars. It is rich in antioxidants and minerals including zinc which aids in boosting the immune system, manganese which aids in energy production and potassium which helps to maintain a normal blood pressure. Also, maple syrup has a lower glycaemic index than refined sugars.

The recipe

There are two versions presented. The first version is for when you open the refrigerator and there is no ketchup and you need some fast food!  This recipe is also great for kids who don’t enjoy strong flavours.

The second version is the “foodie” version, taking a little longer and celebrating each flavour in the ketchup. Great to serve with nachos and elaborate sandwiches and burgers.

Fast food natural ketchup

Ingredients:

  • 3 plum tomatoes with skin removed
  • 1 tsp raw apple cider vinegar
  • 1/8 tsp pink sea salt
  • 1 tsp of maple syrup
  • 1/8 tsp sweet paprika
  • ½ tsp of onion powder

1. Place a pot of water on the stove and bring it to a boil.  Carefully place the tomatoes into the boiling water. Remove the tomatoes after 30 seconds or when the skin of the tomato begins to crinkle. Place them into iced water and then peel the skins.

2. Place all ingredients in a blender.  I use a cup blender, it literally takes seconds to blend. Blend until smooth.

3. A quick taste test to decide if you need more salt or maple syrup. Adjust and serve.natural ketchup

The smooth texture is similar to commercial ketchup. Most kids can’t really taste the difference.  Store the ketchup in a glass jar with an airtight lid in the refrigerator for one week. If I find that after a few days the ketchup was barely eaten, I throw it into a pasta sauce and make a new batch next time I need it.

Optional: If you are in a bit of a bother and have no fresh tomatoes you can use 1 can of organic diced tomatoes. Drain the liquid from tomatoes. Draining the liquid makes the ketchup a little thicker.  Put liquid aside to use in another recipe, otherwise dilute the liquid with water and feed your favourite plants.

Foodie natural ketchup

Ingredients:

  • 4 – 6 fire roasted tomatoes
  • 2 roasted garlic cloves
  • 2 tsp raw apple cider vinegar
  • 1/2 tsp pink sea salt
  • 1 tbsp of maple syrup
  • 1/4 tsp sweet paprika
  • 2 tsp chopped fresh parsley
  • cracked black pepper to taste

Optional: 1 jalapeño chilli

organic tomatoes

1. Fire roast 4 – 6 medium tomatoes and 2 gloves of garlic by cooking over an open flame on a gas or charcoal grill. If I have a good crop of vine ripened cherry tomatoes from our backyard farm, I happily use them for the ketchup. Cut them in half and throw them in the oven with a touch of salt and roast until they start smelling sweet and brown on the edges.

2. Place all ingredients in a blender. Before I process the ketchup I usually know what is the end result I’m looking for. For nachos, I keep the sauce chunky and throw in a jalapeño chilli. This will only need a short whizz in the blender. If I am making roast potato chips I may want a smoother version so I blender the mixture slightly longer.

Once again, give your ketchup a taste. If you need to tweak the recipe for salt, extra sweetener or acidity, adjust a dash at a time and blend. Serve and enjoy!

Tomato Ketchup

How to make a herb spiral

If you are looking for something to do over the holidays, why not make a herb spiral. A herb spiral is a classic piece in a permaculture garden. The herb spiral is traditionally positioned as close as possible to the kitchen for easy access to herbs for meal making or medicinal teas.

Herb spiral
Herb spiral

The spiral also celebrates pattern language. As the spiral rises, the spaces and edges increase creating different microclimates. You can grow more food on any given area by planting this vertical space, giving you access to picking herbs easily.

The microclimates that are created with stones/bricks help you position your herbs according to their sun, shade and water requirements. Mediterranean type herbs such as rosemary, sage and basil enjoy the top of the herb spiral. The sun will be strong with good drainage, making the soil dry.

As the spirals moves downwards, choose herbs that enjoy a little more shade and moister soil. The bottom of the spiral gives shade from afternoon sun and is reserved for herbs that enjoy humidity such as mint and pennyroyal.

Spiraling to the sky

There are a few ways to build a herb spiral. This article will focus on the mound and ground-up model.  First choose a spot in your garden that has at least 6 hours of sun per day.

herb spiral
Multiple herb spirals created as a barrier.

Mound Spirals

The mound spiral is great to make with kids. Simply form a conical mound of garden soil mixed with compost at least 1m in height and approximately 1 – 1.5m in diameter.

Herb spiral

Once you have shaped the mound, place rocks around the base edge of the mound. Before closing the circle,  start to place rocks in a curve going upwards around the mound to make the spiral. As you can see from the photo, round rocks suit this type of spiral perfectly. Some people use bricks or bamboo, and this works well too.

Plant your seedling and then cover the soil with a layer of mulch. My favourite is sugar cane mulch. As it decomposes, it releases the sugars and helps activate the soil keeping soil organisms happy.

Ground-up Spiral

The ground-up spiral is formed on the ground, first with stones and then soil is added. It’s really important to make the base exactly how you want. The stones are positioned in a a circular base of approximately 1.5m in diameter. Once again, before the circle is closed, begin the inward spiral.

OLYMPUS DIGITAL CAMERA
Ground-up spiral

As you can see from the photo, we have used flat stones but you can also use bricks.  Stack the stones/bricks, increasing as they reach the centre. To gain height, introduce more stones carefully while filling the spiral with soil.

At the bottom of the spiral, build a small pond to create habitat for fish, lizards and frogs. You can also grow watercress and Vietnamese mints.

Get to know herbs

Knowing the characteristics of the herbs you wish to plant will help achieve better results for your garden. Every plant has its own characteristics, height, colour and shape.  Researching will help you position them in the ideal microclimate.

If your garden area is small, a series of herb spirals may be the ideal solution as they are beautiful, highly productive and energy efficient gardens that can be easily watered with a watering can or with drip hose irrigation.

herb spirals

How to make the easiest gluten free cheese bread (Brazilian style)

Pão de queijo or Brazilian cheese bread is a tasty gluten free treat. It’s a popular snack food that is usually eaten straight out of the oven accompanied by strong, sweet black coffee. 

Some traditionalists may cringe when they see this recipe, but it is the easiest way to make pão de queijo as you don’t have to roll neat little balls of dough.  This recipe uses a blender and is fast and efficient then you simply pour the batter into a muffin tray to be placed in the oven. Perfect for the busy mama or for someone that is starting out on a gluten free diet.

There are several different recipes where the ingredients and the type of cheese vary as well as the final result. This particular recipe uses tasty cheese to make a chewy cheese bread. You can also use mozzarella and parmesan cheese. In Brazil the more traditional ripened cheese is used.

The people from the state of Minas Gerais will happily argue that they make the best pão de queijo in Brazil 🙂

This recipe makes approximately 20 pão de queijo. First pre-heat the oven to 200 °C.

Ingredients:

  • 2 cups of milk
  • 1/2 cup of olive oil
  • 1 egg
  • salt to taste
  • 400 grams of grated tasty cheese
  • 1/2 kg of tapioca flour
  1. Place milk, olive oil, egg and salt to taste in a blender.
  2. Add tapioca flour.
  3. Blend on slow speed until you have a smooth mixture.
  4. Place 1/2 of the grated cheese into the blender. Mix on slow speed. At this moment it doesn’t matter if the mixture is a little lumpy with cheese. Place in a bowl.
  5. This is the moment where you can personalise your cheese bread. Traditionally, it would be placed straight into the oven. In this recipe, we added chopped olives, dried tomatoes and oregano. Cheese Lovers: Top the batter with extra cheese.
  6. Pour batter into greased muffin tin.

cheese bread.jpg
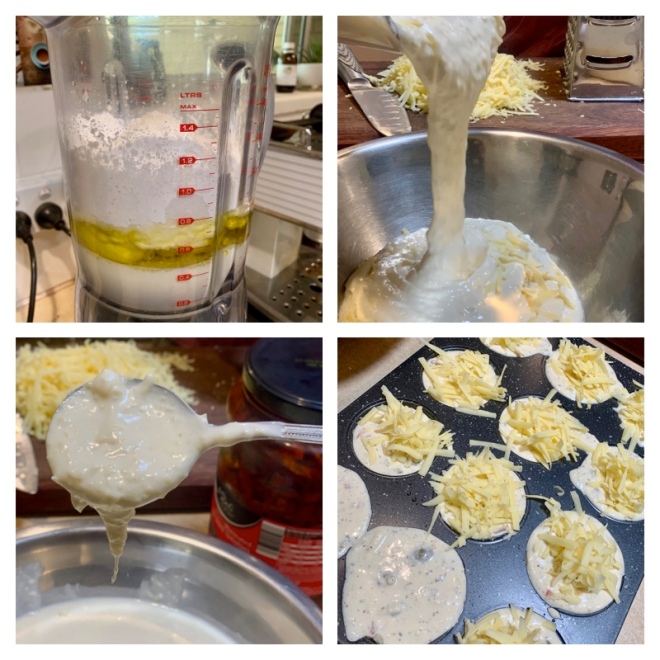
Place in oven for approximately 30 minutes (200 °C). If you find that you have too much batter, simply pop it in the fridge for the next day.

  • Start brewing some coffee.
  • After 30 minutes, remove from oven.

Pão de queijo are at their crunchiest best when they are still warm from the oven. Eat and enjoy.

Pão de queijo soften over night. Store them in an airtight container in the fridge.

cheese bread 2.jpg
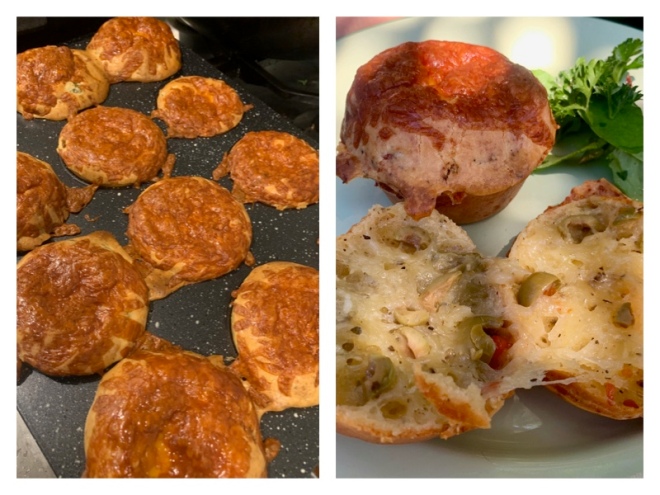
Tapioca flour is made from manioca/cassava. Tapioca flour is found cheap in most Asian supermarkets.  You can either use sweet or sour tapioca flour.


Have Fun With Vitamins – Kids Gardening

Feeding children can be like riding a rollercoaster. Some days they just eat whatever you give them. Other days it’s like a terror, as it can be close to impossible to get them to eat anything at all, especially vegetables. Children can become picky eaters for a number of reasons. Some children are simply more sensitive to taste, smell and texture. Although, children generally have a more heighten sense of taste, as their taste buds haven’t been affected with prolonged intake of salt, sugar, caffeine and other substances. Children may also develop picky eating habits by modelling their parents, siblings or peers. So how do we encourage children to eat a variety of food, especially vegetables?

Studies have found that picky eating habits are more likely to develop when parents punish, bribe or reward their children’s eating behaviours.

Grow food with your child/ren

planet schooling grow veggies kids eat greensResearch tells us something many mothers already know, that when children are involved in growing, preparing and cooking their own food they are more likely to eat it.

Kids that grow greens, eat greens.

When young children learn to take care of growing plants they develop a natural sense of curiosity. Children naturally experience the world through tasting, touching, smelling and feeling.

Growing your own food with your child/ren is an extremely rewarding and satisfying activity. Gardening together strengthens the bond between you and your child as well as your connection to our beautiful Earth. You might be pleasantly surprised to find your little one munching on some snow peas or cherry tomatoes.

Teach your child to love and appreciate nature through gardening.

Substitute Sugar

Now let’s have a quick chat about sugar. Eating too much sugar can lead to all sorts of problems in later life such as obesity, diabetes and cardiovascular disease. However, did you know that sugar also lowers your immune system?  So every time our children are eating sugar, their immune systems are getting affected which makes them more prone to catching colds and other common infections.

planet schooling homeschooling homeschoolHowever, if you don’t allow you child to taste sugar at all throughout their childhood the chances of them becoming highly “addicted to it throughout their teenage years is much greater. Teenagers tastebuds have a greater affinity to sweet things. So the trick is to find a happy medium.

All sugary foods can be “sometimes foods”, thats why we call them “treats” as they should be consumed only sometimes. In my experience reducing the amount of sugar intake encourages children to start eating more vegetables as their tastebuds become more sensitive to the natural sweetness in vegetables.

If possible avoid giving children any sugar until the age of three.

Protein Power

Let’s not forget the importance of protein. Protein is crucial for a child’s physical, mental and emotional development. Without it, children’s growth can become stunted and experience learning difficulties. Now I’m not going to say start eating meat but if you are vegetarian or vegan it does require extra planning and cooking to make sure your child is eating the recommended daily intake or protein. My son is vegetarian by choice and we are constantly coming up with new ideas. There are many great cookbooks out there to help plan meals.

Lunchboxes

Growing your own vegetables also means you have fresh organic produce to pick for your child’s lunchbox. Child fun foods include growing snow peas, green peas, cherry tomatoes, cucumbers, carrots, lettuce and so much more, which can all be use as an easy and healthy lunch snack. In Pete Evans lunchbox book, he suggests a simple formula to prepare a healthy lunchbox that will help our kids thrive at school.

Simple lunchbox formula = one serve of season fruit + raw or cooked season vegetable + serve of protein and fat

Tell me how you go. If you like the article please share.

vitamins.png

Stay tuned for our Rainbow Eating challenge 😉